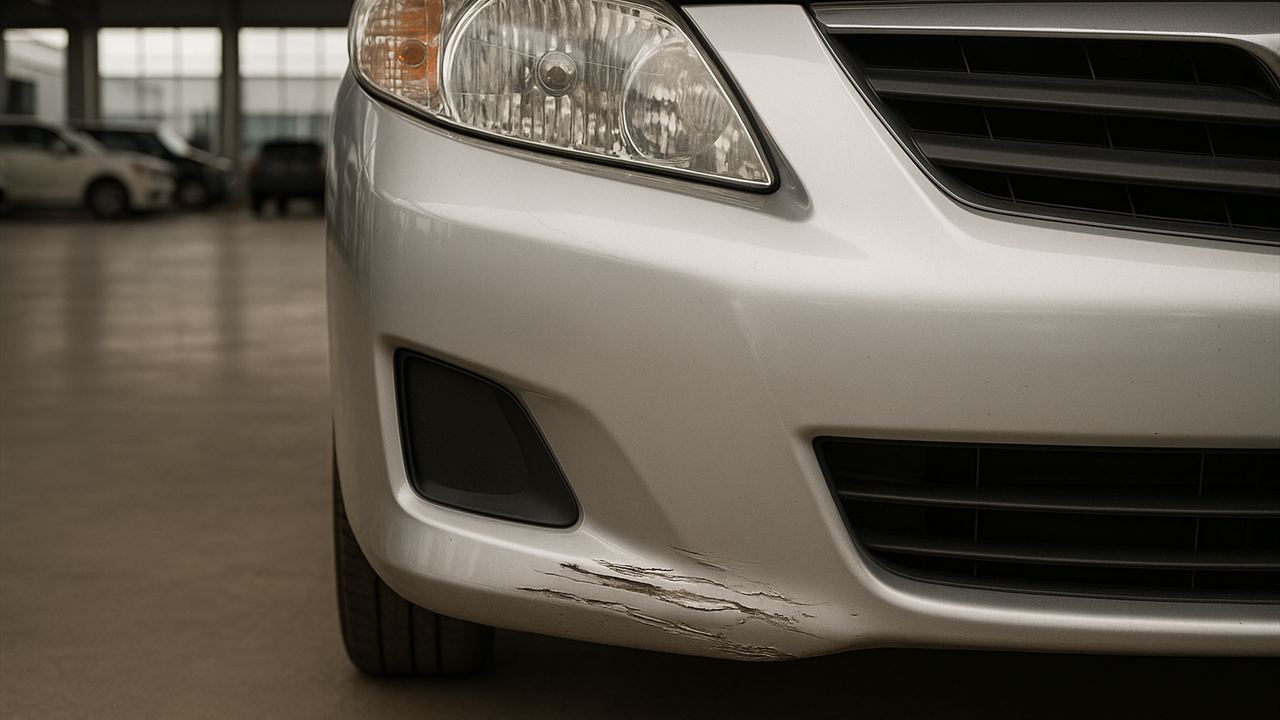
Photograph a scratch as a pair of images: one that places it on the vehicle and one that shows the detail beside a scale. Add an angled view when reflections prevent the camera from recording the mark clearly.
Your remote buyer wants to avoid a surprise at delivery. You need to show what is there without making a small mark look like it dominates the panel. The sequence below documents visible condition; it does not establish scratch depth or support a repair estimate.
1. Wash the affected panel and dry it completely
Follow the vehicle’s care instructions rather than rubbing a dirty panel with whatever cloth is nearby. Ford’s exterior-care guidance recommends neutral-pH car shampoo, warns against washing hot bodywork or working in direct sunlight, and calls for drying with a soft towel or chamois.
Stop at cleaning and drying. Do not polish the area or apply a scratch-concealing product before documenting it: that changes the job from recording the existing condition to altering it.
Inspect the dry panel in open shade or under an overcast sky. Nikon explains that cloud cover provides naturally diffused light. Before lifting the phone, locate both ends of the scratch and check that you are not including a remaining droplet or streak of dirt as part of it.
2. Show the panel before moving closer
Stand back far enough to include the affected panel and a recognizable landmark beside it. A door handle or wheel opening helps the buyer place the mark and understand how much of the vehicle it occupies. If the frame leaves the vehicle’s side or the panel’s position unclear, widen it.
Keep the scratch’s location inside the frame, but do not abandon the wider view because a fine line looks faint at that distance. This photograph establishes where the detail belongs. The close-up will show the mark itself, while your caption will identify its position more precisely.
3. Make a sharp close-up with a noncontact size reference
Move closer while keeping the entire scratch visible, with some undamaged paint around its ends. Use ordinary Photo mode without a creative filter. Aim for enough detail to follow the line, not the tightest crop the phone can produce.
Ask a coworker to hold a ruler beside the scratch without touching the paint. Keep its markings facing the camera and its measuring edge parallel to the scratch’s general direction. Hold it just clear of the surface, without covering the mark or casting a shadow across it.
In its 2025 photography guidance, the digital-evidence working group SWGDE recommends placing a scale at the subject’s plane and keeping the camera’s sensor parallel to that plane when dimensions matter. Apply that principle by holding the phone square to the local patch of paint and keeping the ruler nearly the same distance from the camera as the scratch. Treat a hand-held ruler hovering beside curved bodywork as an approximate size reference, not a precision measurement.
Set focus on the scratch rather than the surrounding reflection. On an iPhone, Apple documents tapping the subject area to set focus and using the adjacent exposure control to adjust brightness. If the close view remains blurry, back away slightly and refocus; do not accept blur just to make the scratch fill more of the screen.
Take the picture, then enlarge the saved image before leaving the panel. Check the scratch itself as well as the ruler markings. A legible ruler is not enough if the line you are documenting is soft.
4. Add an angle only when it reveals missing detail
If a reflection crosses the scratch, move sideways or change the phone’s height a little while watching the screen. Keep track of the same mark and photograph it when you can follow its full length. This oblique view looks across the panel rather than directly at it.
If changing your position is insufficient, try a separate photograph with a handheld light shining across the surface from one side. In its 2022 lighting guidance, SWGDE describes low-angle side lighting as a technique for emphasizing texture. Use it to reveal a difficult section, rather than hunting for the most dramatic appearance.
Keep the diffuse-daylight close-up alongside this additional image. Label the extra photograph “angled view” or “side-lit view,” whichever describes what you changed. The buyer should not have to assume that the strongest-looking angle represents how the panel appears from every position.
5. Send the images together with a location caption
Put the panel view first, followed by its close-up and any additional lighting view. Keep the set together in the message or listing so the buyer can connect the detail to the vehicle without searching through unrelated inventory photos.
Identify the vehicle by stock number and describe the location using a fixed landmark. Here is a caption for an invented listing:
Stock 4182. Driver-side rear door, below the handle. Panel view followed by a close-up with inch markings beside the scratch. Final photograph taken from an angle.
Describe what you documented rather than adding “minor,” “clearcoat only” or “will buff out.” Those phrases ask the buyer to accept a judgment about severity or repair. If they ask what the repair will cost, arrange an assessment instead of turning the photograph into an estimate.
Avoid edits that change the condition being shown
Leave retouching tools and AI object removal out of these images. Do not erase a reflection after capture, because your buyer needs a record of the photographed surface rather than a reconstructed version of it. Reposition the camera and shoot again instead.
Do not use a heavy contrast treatment to rescue a faint scratch, either. Correct the capture conditions first, and preserve the original files with the vehicle’s condition record. If you need an arrow to identify the location, add it to a separate labeled copy and keep it away from the scratch itself.
Check the version your buyer will actually receive
Give the enlarged close-up the most attention during review. Look for a bright reflection cutting through the line or an endpoint disappearing into blur. Checking the stock number and caption is the simpler administrative check, but it still matters: good photographs attached to the wrong vehicle are unusable.
Open the uploaded or sent images, not just the originals on your phone. Confirm that the detail remains readable and that the panel view stays with it. Ask a coworker to locate the scratch from the set without you pointing at the car; if they cannot, improve the framing or caption.
Start with the dry panel in diffuse daylight. Once you can identify the mark clearly in person, make the wider photograph before moving in. That first frame gives every close-up that follows its proper context.